Textured Towns

Description
This lesson idea is a great combination of exploring the look of different kinds of communities and experimenting with the mixing and texturing of paints. Young students will enjoy talking and learning about rural communities, suburban communities and various kinds of urban communities. Trying out tempera paints and paint scrapers to create a variety of textured papers for their Texture Town will be an exciting activity for them as well.
Objectives
- Students will learn about different kinds of communities as well as identifying and discussing the attributes of their own neighborhood.
- Students will have the experience of mixing colors and will learn some beginning color theory.
- Students will create a variety of different textures/patterns on paper from which they can cut shapes to create their Texture Town.
- Students will make choices about what kinds of shapes will best create the look of the type of community they wish to represent.
Supplies Needed
Art Time® Washable Tempera Paint Assortment, 12 Colors 1329050
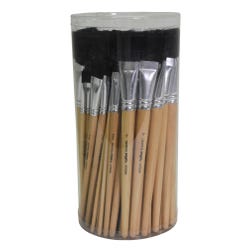
School Smart® Black Bristle Brush Short-Handle Set, 72 Brushes 248317
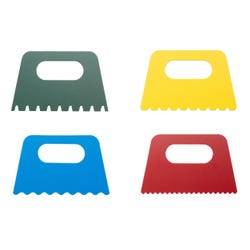
School Smart® Paint Scrapers, Set of 4 085829
School Smart® White Tag Board, 100-Sheet Pkg., 9 in x 12 in 085496
Tru-Ray® Construction Paper, 50-Sheet Pkg., 12 in x 18 in, Assorted 054156
Railroad Board, 25-Sheet Pkg., 6-Ply Assortment 085553
Painters Paint Markers, 5-Color Set, Bright Colors 411072
Painters Paint Markers, 5-Color Set, Craft Colors 411073
Things You May Also Need:
Pencils and Erasers
Scissors
Paste or Glue
Water Containers
Paper Towel
Paper Plates
Color Wheel
Photos (or Other Visual Resources) of Various Neighborhoods
Standards
CONTENT Standard #1:Understanding and applying media, techniques and processes.
Grades K-4: Students will use different media, techniques and processes to communicate ideas, experiences and ideas.
CONTENT Standard #2:Using knowledge of structures and functions.
Grades K-4: Students will use visual structures and functions of art to communicate ideas.
Instructions
1
Discuss the color wheel. Depending on the ages and experience of the students, demonstrate color mixing, using paper plates as palettes.
2
Now demonstrate ways of making textures and patterns with the paint scrapers. Brush the paint onto tag board and scrape through it in various ways with the four scrapers.
3
Cut enough of the 9 in x 12 in tag boards in half to allow about six sheets per student.
4
Let the students mix a color for themselves, paint a sheet of tag board with it, scrape a texture into the paint and set it aside to dry.
5
Repeat on five more sheets with different colors & different designs.
6
Discuss various types of neighborhoods common in the USA (or the country in which you live). Photos or other visual resources for the students to look at would be helpful. What kinds of buildings do people live in? How many families or people live in each kind? What're common shapes for these buildings? What are the shapes on the buildings (roof, windows, doors, etc?) What other things would you see in the neighborhood, e.g. vehicles, mailboxes, trees, gardens? What shapes would these things be?
7
Have the students sketch the shapes with which they will create their Texture Town on the back of the dried paintings. Remember, when they cut the shapes out, the paint sides will be reversals of what they drew.
8
Arrange the shapes on a piece of construction paper.
9
Use a pencil to mark where some of the pieces will be glued.
10
Begin gluing down the shapes until the picture is complete.
11
Help students make a list of words naming the things in their picture.
12
Mount the pictures on a piece of railroad board big enough to allow a large border around it.
13
Have students choose words from the list and, using a pencil, write them in large letters on guidelines drawn on the railroad board.
14
When the words are arranged evenly around the picture the students can go over them with a contrasting color marker.
15
They may want to include some small shapes cut from their painted paper in between the words.


