Close

Organic Radial Abstractions
Lesson Plan, Grades 6-12, Art History, Science, DecoArt, Painting, Printmaking

Description
Lesson Plan and Artwork by Monica Hayslip
Hydro dipping, or water transfer printing, involves transferring floating pigments onto paper using thickened water. This technique, with origins in the ancient Japanese art of Suminagashi, dates back over 2,000 years. In this project, students will explore hydro dipping using DecoArt® Water Marbling materials to create unique marbled designs and experience a historic art form.
Objectives
- Explore hydro dipping and monoprinting using the Deco Art Water Marbling Kit to investigate hydro dipping and monoprint techniques.
- Create unique designs using a range of contrasting acrylic paints and produce distinctive patterns through the water marbling method.
- Apply the principles of fluid dynamics to create a monoprint, learning how the movement and interaction of fluids affect the outcome of their artwork.
Supplies Needed
DecoArt® Water Marbling Kit
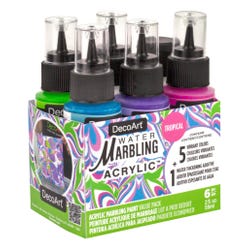
DecoArt® Water Marbling Acrylics, Tropical Colors, Set of 6
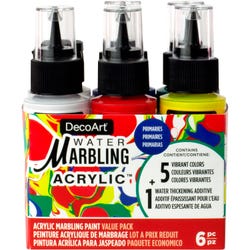
DecoArt® Water Marbling Acrylics, Primary Colors, Set of 6
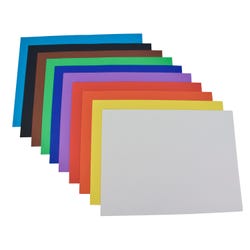
Sax® Colored Art Paper, 12" X 18", 50 Sheets
*Here are the supplies needed for this lesson plan for reference. Find a convenient carousel of shoppable products for this lesson below.
Standards
Standard #1: Generate and conceptualize artistic ideas and work.
Standard #2: Organize and develop artistic ideas and work.
Standard #3: Refine and complete artistic work.
Instructions
1
Follow the manufacturer’s directions to prepare the workspace, mixture, and liquid acrylic paints.
2
One by one, drop paint onto the surface of the Magic Medium from 1-2 inches above. This height helps create a spreadable pattern. You can drop colors side by side or layer them on top of each other, arranging them randomly or in deliberate patterns.
3
Continue adding as many colors as desired until the surface is sufficiently covered. Use the marbling stick to swirl and manipulate the paints, creating lines and shapes as you envision.
4
Select a piece of cardstock or marbling paper from the kit. Hold it in a U shape to avoid touching the paint directly.
5
Gently lay the paper flat onto the surface of the painted Magic Medium. Ensure the entire paper makes contact with the paint.
6
Allow the paper to rest on the surface for 25-30 seconds. You will notice the edges of the paper starting to curl as it absorbs the paint.
7
Carefully lift the edges of the paper to remove it from the tray. Allow any excess Magic Medium to drip off before placing the paper flat on the drying rack.
8
Let the print dry for a full 24 hours. If desired, you can iron the back of the dried monoprint to flatten it and improve its appearance.
9
Using scissors, X-Acto knives, rulers, templates and compasses, measure and cut shapes to create radial patterns.
10
Glue with clear glue or glue stick.
11
Use folding, curling, twisting and scoring of designs and contrasting cardstock to create a radial low relief sculpture.
Pro Tips:
- Magic Medium solution can be prepared ahead of time and stored at room temperature in clean, empty water jugs. Itremains usable for up to 5 days.
- When drops of paint cease to spread on the surface, refrain from adding more paint, as it will not adhere properly.
- Avoid using soap to clean trays; simply rinse with water. For best results, skim the surface with a paper towel or newspaper to remove any residual paint before starting a new print.
- Iron dry designs to flatten them for easy measuring and cutting.
- Use a cotton swab to clean up excess glue on the sculpture.