Close

Glimmer of Falling Leaves
Lesson Plan, Grades 3-8, Science, Art, Drawing, Painting

Description
Lesson Plan and Artwork by Jack Matthews
Who can deny that autumn is the most beautiful time of the year? The leaves are on fire with color! It is very easy to take for granted all the falling leaves we see around us. This lesson will take students on a visual excursion, allowing them to create a colorful composition and, with the help of some metallic paints, will bring the students to a final destination that shimmers and shines!
Objectives
- Study various leaf formations
- Discuss various colors seen in leaves
- Create a composition made up of “falling leaves”
Supplies Needed
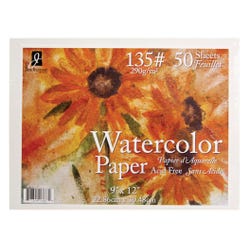
Jack Richeson™ Watercolor Paper, 12x18 in, 135 lb, White 50 Sheets
Jack Richeson™ Art Paint, 15 Color Set
Jack Richeson™ Semi-Moist Collegiate Watercolors, 12 Metallic Colors
Jack Richeson™ Plastic 7 Well Palette Trays, 31/4 x 71/4 in, Pack of 12
Jack Richeson™ Short Wood Handle Camel Hair Paint Brushes, Assorted Sizes, Pack of 60
School Smart® Pointed Tip Scissors for Students, 61/4 in, Red, Pack of 12
Ticonderoga® Pre-Sharpened #2 Pencil with Eraser, Pack of 72
3M™ 201+ General Use Masking Tape, 1 in x 60 Yards, Tan
Sharpie® Fine Point Permanent Marker Value Pack, Black, Pack of 36
Standards
Standard #1: Generate and conceptualize artistic ideas and work.
Standard #2: Organize and develop artistic ideas and work.
Standard #3: Refine and complete artistic work.
Standard #6: Convey meaning through the presentation of artistic work.
Instructions
1
Discuss the seasons with students - temperature and how leaves change colors. Name colors.
2
Show students images of leaves and fall landscapes.
3
Take students on an outdoor trip to collect leaves or have students bring in leaves from around their home/neighborhood.
4
Using pencil and posterboard, have students draw a leaf shape by looking at their leaf (leaves should be as close to life size as possible). Cut leaf shape out from poster board.
5
Students will use masking tape to create a clean border around 12x18 watercolor paper, taping it down to surface.
6
While working in groups, students will share their leaf cut outs, tracing them and allowing for overlapping in order to fill their composition.
7
Beginning with innermost negative spaces, students will use dark (blacks, browns) paint to fill in. Show students how paint can be used like watercolor. NOTE: Use paper towels to blot these areas as you paint to create an interesting texture.
8
Students will select various fall colors of paint (non-metallic) to cover various leaves that have been overlapped.
9
For final leaves that appear on top (no overlapping), students will select metallic watercolor paints to fill in leaf shapes.
10
With a fine point black Sharpie, trace leaves, adding veins. DON’T go overboard on this part! Stems may be added as well.
11
Have students take a small amount of black paint and “fleck” onto composition using either stiff, flat paint brush or an old toothbrush.
12
Carefully remove masking tape.